
This past January I had the entire month off! As most of you know I’m finishing my last year of podiatry school and I had the option to have one month off before February! I opted to have January off so I could study for interviews and enjoy a break from driving in the snow! I was able to catch up on my sleep, do a lot of running and be creative! I’ve always loved creating things especially with fabric (surprise, surprise I love Project Runway) but it has sadly been over a year since I’ve had time to make anything. This past month I was able to create several things! First a tutu outfit for my only niece who turned one in January! She is such an adorable girl and since I know she loves prancing around in tutus I decided to make her one!

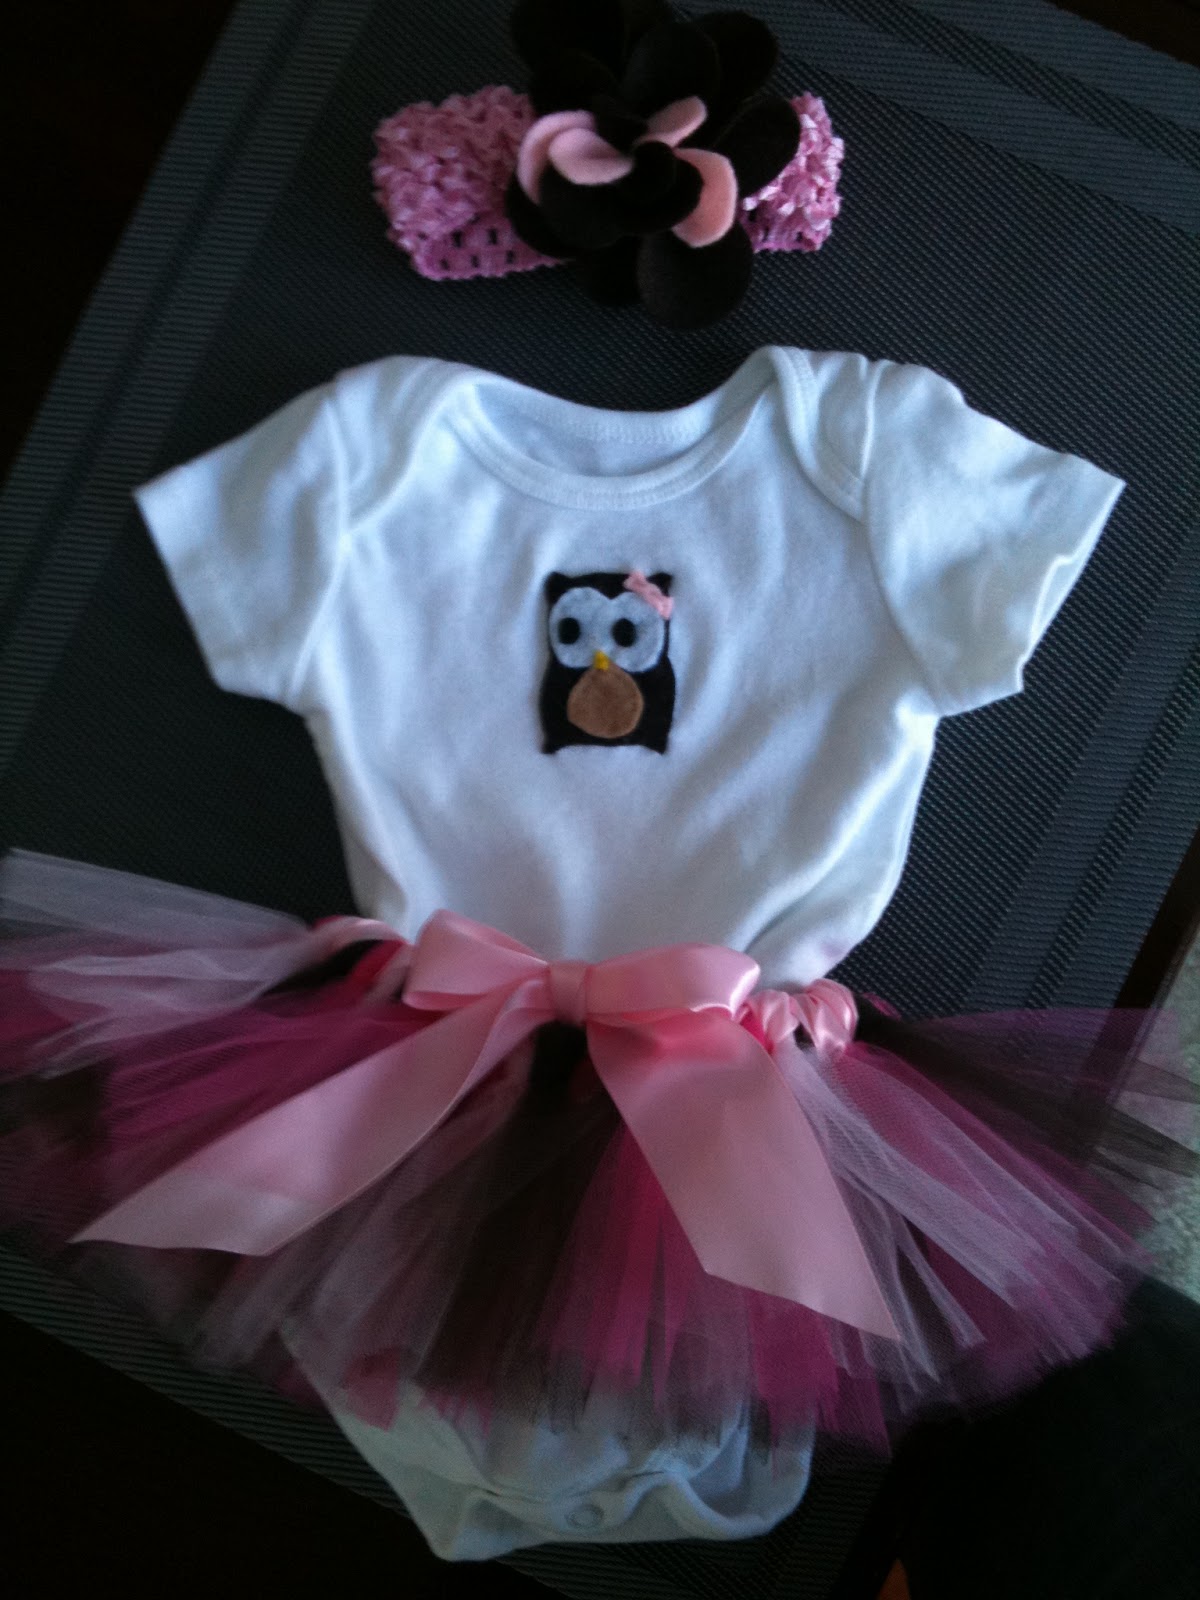
Here is the onesie portion of the outfit. I bought a plain white onesie from Walmart and then added the appliquéd number one and a felt owl. The owl took some time to put together but it was worth it!

Here is the tutu. . . I just love how it turned out! I had never made a tutu before but it was super easy! Angie Neil on her blog http://treasuresfortots.blogspot.com/ had the best tutorials on how to cut and put together your tutu.
How to cut tutu so you don’t end up with all different lengths:
How to put the tutu together:
For my tutus I decided to use elastic since it seemed more durable and higher quality, but you can also use ribbon as your waistband.
I bought crocheted ribbon headbands from walmart and attached a rose made of the same fabric as the number 1 on the onesie. Here is where I found how to make the rose: http://littlebirdiesecrets.blogspot.com/2009/08/make-fabric-flower-and-flower-tutorial.html. I just love the name of the blog: “Little Birdie Secrets” how cute is that!
Finished Project #1:

My second project was also a tutu, but a tutu for a newborn! It is so tiny and adorable! I made it for Jon’s cousin’s baby shower!
Finished Project #2
This onesie was similar but simpler with only an owl on the front.
This tutu was constructed the same way but I satin wrapped the waist band to make it less scratchy for baby! This tutorial was also found on Treasures for Tots at:
See:

The headband has felt brown and pink pedals formed into a flower and attached to the headband (sorry, blurry).

To top it all off I had been thinking how I could wrap this gift for the shower and being frugal and not wanting to buy anything I creatively reused a Victoria Secret bag by covering up the “Victoria’s Secret” with “Baby’s secret” and gluing scrunched up pink tissue paper around the boarder.

I love reusing these quality bags, just remember to save the tissue paper too! I think I got more compliments on the bag than the tutu, pregnant mom even had to pause to have a picture taken (it wasn’t me, seriously)! Hooray for creativity! Jon’s cousin loved it; she said she couldn’t wait to doll up her baby girl!
The last couple projects I worked on were baby blankets! I made one for a good friend from school whose wife just had a little boy and one for a baby girl (Jon’s cousin’s baby). I have yet to finish the one for Jon’s cousin's baby since I need to monograph it with her name and birth date once she is born. I recently heard that this baby girl was born but didn’t hear an official name so I guess I’ll wait a little longer J.
One of my favorite parts of making a baby blanket is picking out the fabric! Since I fell in love with this blanket by Joel Dewberry (http://joeldewberry.blogspot.com/2010/07/project-idea-and-giveaway.html) I went in search of some fabric like it at Jo-Ann Fabric and Craft store. Disappointment, nothing was as handsome and modern as Joel Dewberry’s fabric so I found it for a good price from fabric.com! This is my favorite fabric right now! For the back I like to use dotted minky which is always so soft perfect for baby blankets.
Finished Project #3


On the minky side I appliquéd an “L” for Lucas and down the long side of the “L” I monogrammed with embroidery thread baby’s name using this technique: http://www.needlenthread.com/2006/10/embroidery-stitch-video-tutorial-stem.html.

Along the bottom I put baby’s birth date!
With all my blankets I try to create a not-so-baby blanket with fabric that doesn’t have animals, blocks or other baby type patterns so if the blanket lasts till they are grown it doesn’t look dated! I still have a blanket with my name on it but the pattern screams “I was born in the 80’s.” Maybe my blankets will seem that way in 20 years but here’s to trying!
Do you make the tutu's in adult sizes? I'd like to order one for a gift for Jon.
ReplyDeleteSo cute. Nice blankie.
ReplyDelete